How to create and add a custom form to my flipbook?
Custom forms are a great way to gather valuable information, collect feedback, or create an interactive experience within your flipbook.
Whether you're a designer, a marketer, or simply someone looking to enhance your flipbook's functionality, this guide will provide you with step-by-step instructions and useful tips to successfully create and integrate a custom form into your flipbook.
Creating a form
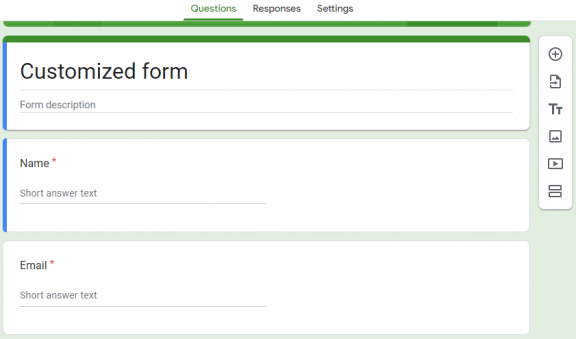
Firstly, create a form you would like to add to your flipbook. One of the best ways to do it is by using free Google Forms as we did in the instruction below.
You can start either by using a template or creating a blank one, by clicking on the PLUS icon on the left.

Now you can customize your form fields and decide which information you would like to receive from your viewers, like in the example below.

NOTE!
Every newly created form automatically requires from viewers to log in to their Google Account before they can fill them out. We suggest disabling this option to make sure everyone will be able to access it even if they are not signed to Google. To do this, please follow the instruction below:
Go to the SETTINGS tab and click on the RESPONES bar as in the screenshot below.

Nextly, toggle LIMIT TO 1 RESPONSE to the left.

Now everyone will be able to fill out your form without logging in to Google Account.
Once your custom form will be ready, click SEND button, located in the top right corner.

Then the pop-up window will appear on the screen.
Select the LINK icon and click on COPY button located in the bottom-right corner.

Adding a form to your flipbook
Now, when your form is ready, you can add it to your flipbook.
To do this, go to the HOTSPOTS panel by clicking ADD HOTSPOT button located on the chosen flipbook's bar.

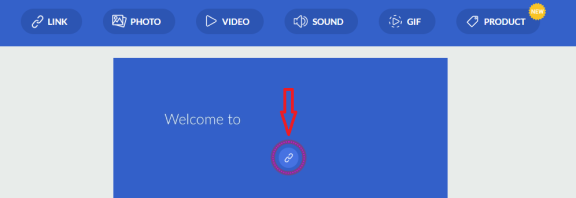
Once the hot spot editor opens, click on the LINK button located in the top menu.

Your LINK hotspot is now created and will have its icon on the screen, like in the example below.

Now, when the hotspot is ready, you can add a form to it, so it will come up in a pop-up form when the hotspot is clicked.
In order to do this, go to the edit panel on the right and then check the radio button next to the WEBSITE title, like in the screen below.

Then paste an URL link (that you've copied in Google Docs before) into the input field.

Now, you can also choose the way your forms open when the hotspot is clicked. When you toggle the upper switch to the right, it will open in a pop-up window. When the lower switch is toggled to the right it will open in a new tab of your browser. It's totally up to you and your preferences.

When all is set, click the SAVE button in the top left corner, to save all changes.

Congratulations, you have just added your new form to your flipbook. You can share it with the world now! Well done 🙂
NOTE!
You can customize the appearance of your newly added hotspot too! Yes, you can change the color of its background/icon with a few clicks!
Hotspot customization
To do it, please go to the PREFERENCES tab on the same editor as we used before (on the right-hand side) and choose the colors you like. You will find more informations about this function here: How to customize hotspots?

When you're happy with the way your interactive hotspot looks just click the SAVE button once again.
You may be also interested in:
How to add videos to your digital publication?
How to add audio files to your flipbook?