


How to add product tags?
What is a product tag?
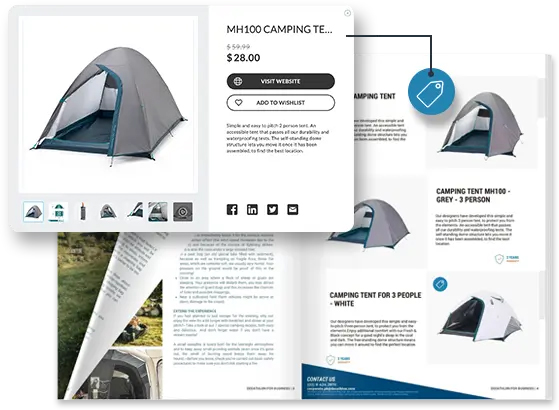
A product tag is a powerful online sales tool that makes your online flipbooks even more interactive and shoppable.
Tags not only guide customers to the right product pages, increasing the likelihood of sales, but also provide valuable insights into which products generate the most interest. This data allows you to optimize your marketing strategies for better sale results.
What can I do with the product tag feature?
Tag your products with interactive hotspots by adding photos, videos, and product links. Promote your offerings with discount deals and showcase them more effectively. Use tags to track customer interests through the wishlist feature, providing valuable insights into which products resonate most and allowing your audience to shop faster directly from your publication.
Ready to get started?
Adding a product tag
STEP 1
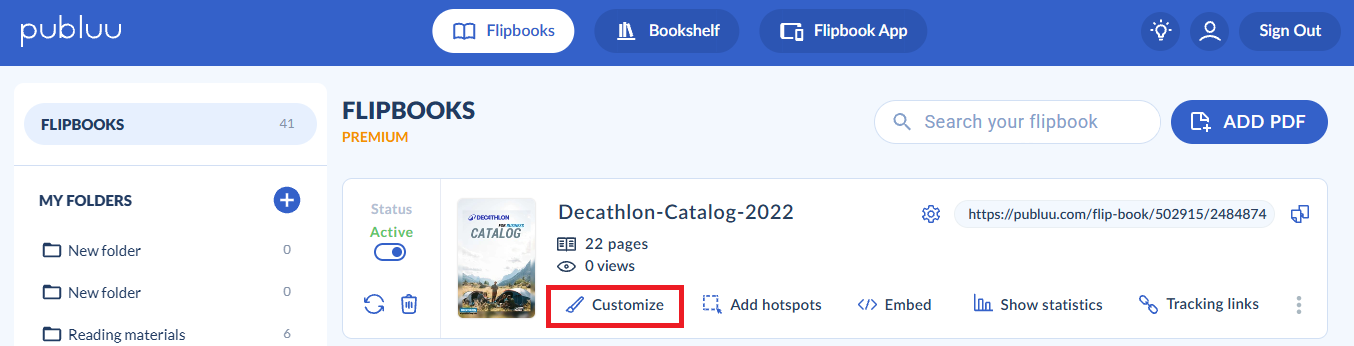
To tag a product, first, log in to your Publuu account, then find your publications and select the CUSTOMIZE button.
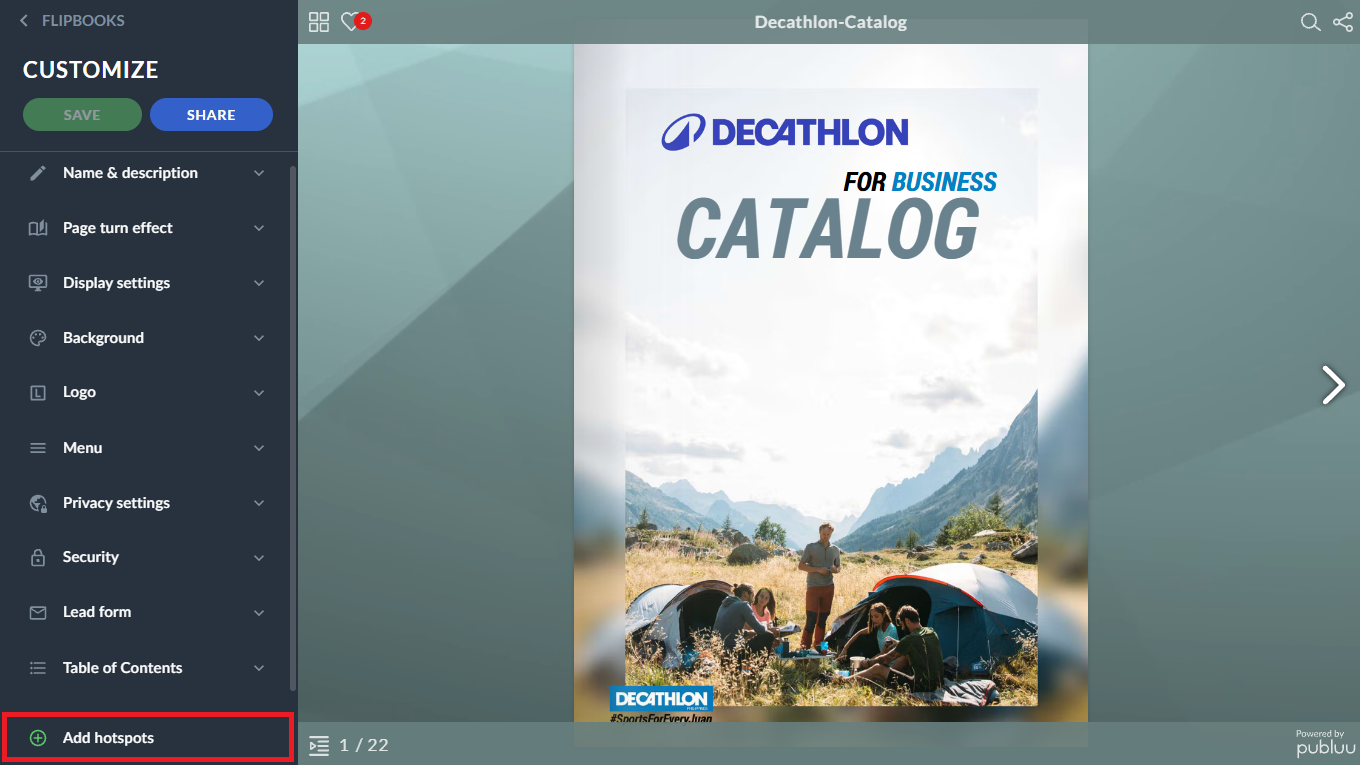
When you enter the editor press the ADD HOTSPOTS option at the bottom of the customization menu.
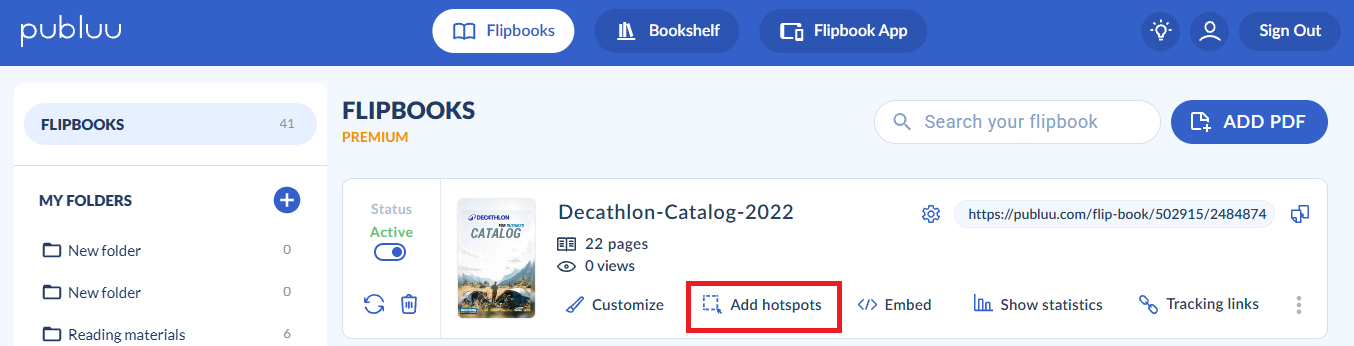
Alternatively, you can select the ADD HOTSPOTS button, which moves you directly to the hotspots and their customization.
STEP 2
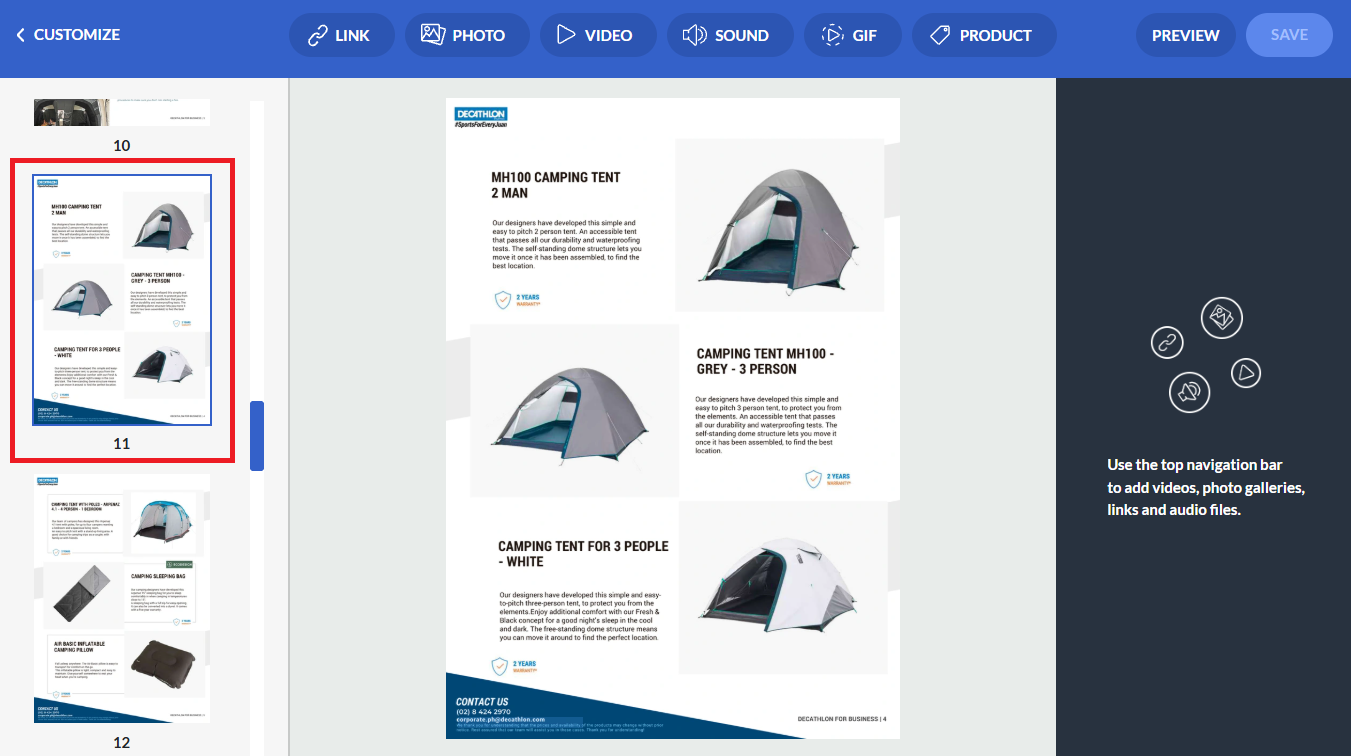
Use the navigation panel on the left to choose the page you’d like the Product Tag to be placed. Once you click the page it will appear in the middle of the screen.
STEP 3
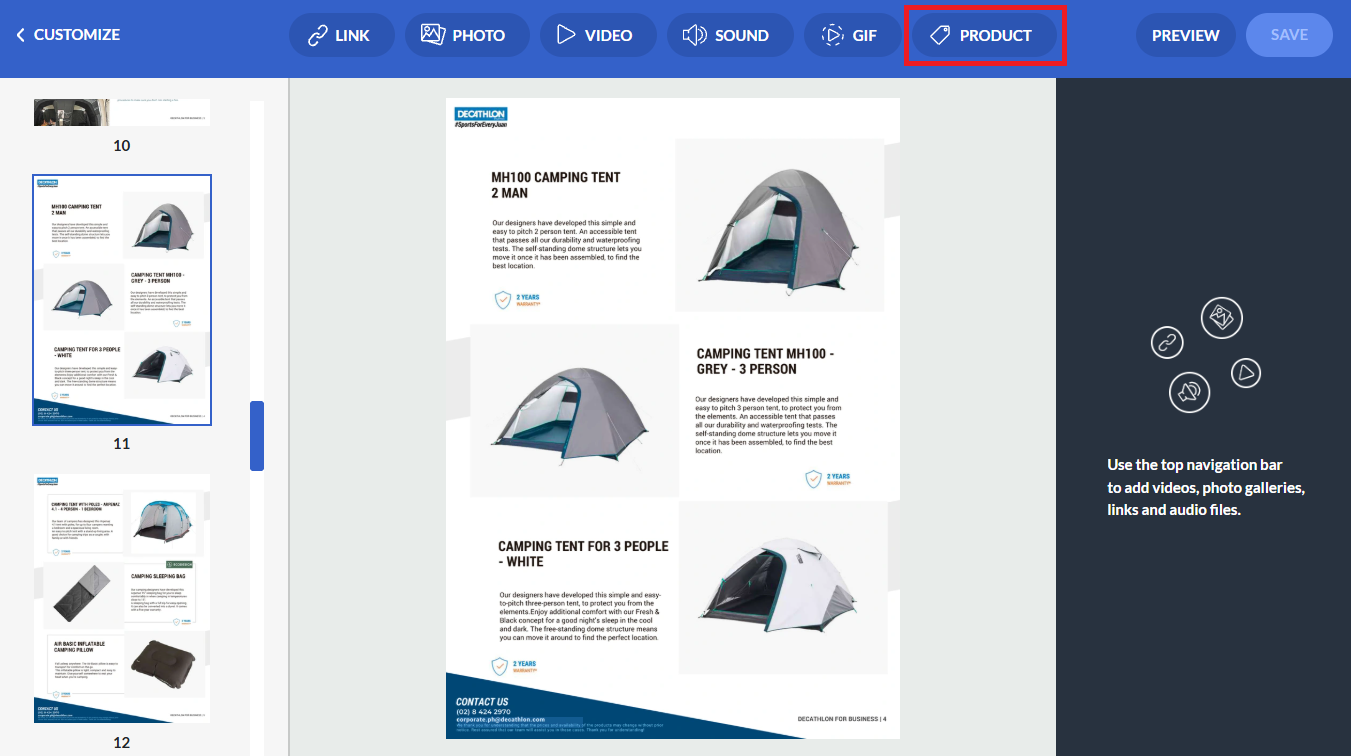
Next, click the PRODUCT of the hotspot options from the top menu.
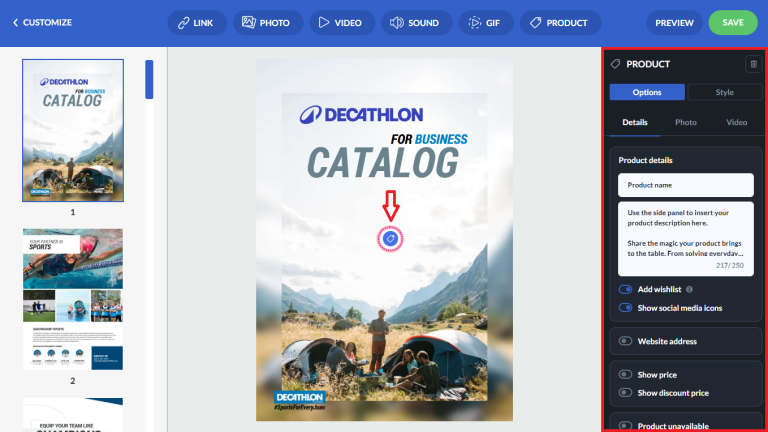
When you do so, a Product Tag hotspot will appear in the center of the page, and the Product Tag menu — including all options and style settings — will open on the right‑hand side.
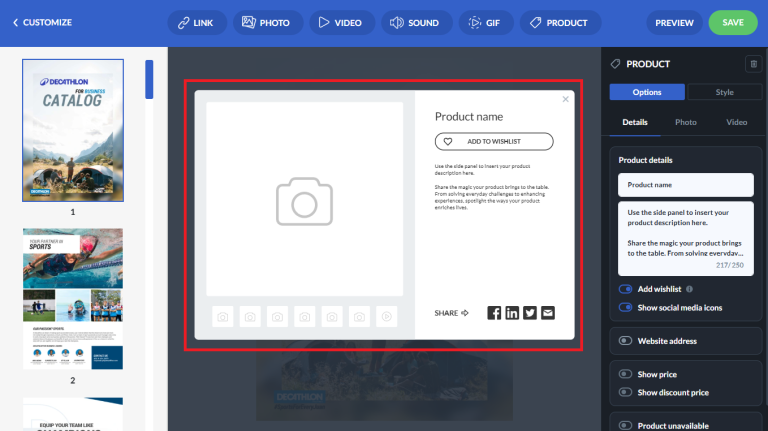
Then once you click on the Product Tag hotspot, a Product Tag pop-up will appear by default like in the screenshot below:
STEP 4
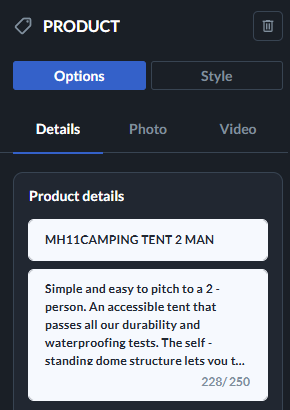
Once you add a Product Tag you can add product details such as name, and description here:
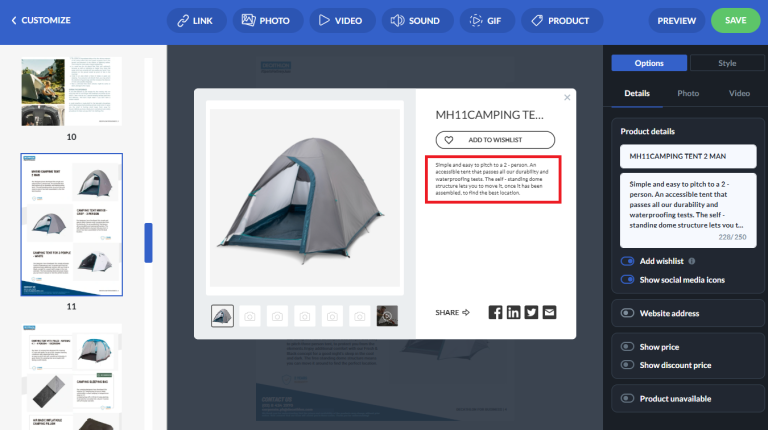
Now you can notice that it appears just right here:
ADD PHOTOS
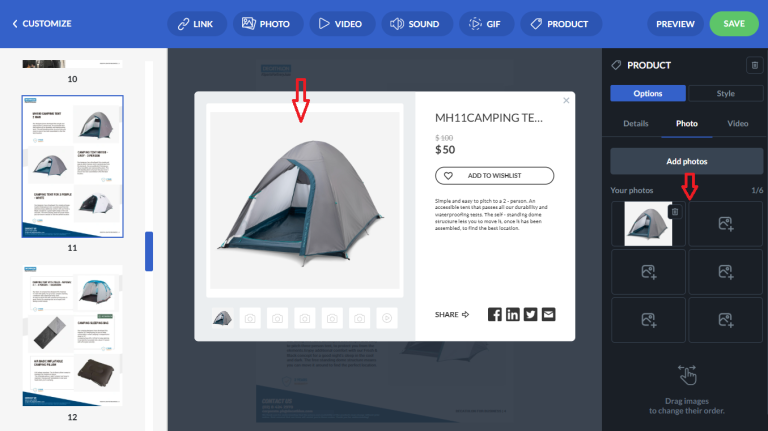
To add photos, choose the PHOTO button and import images from your hard drive:
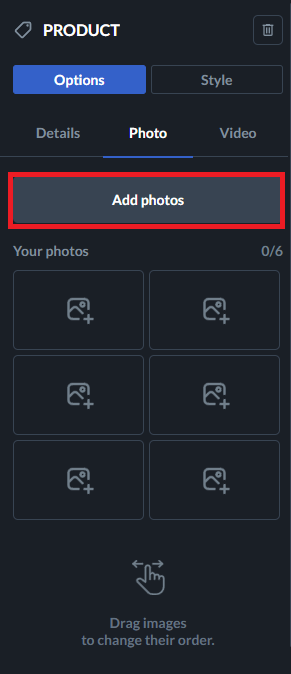
or just simply drag and drop the files here. In addition you can also change the order of the images.
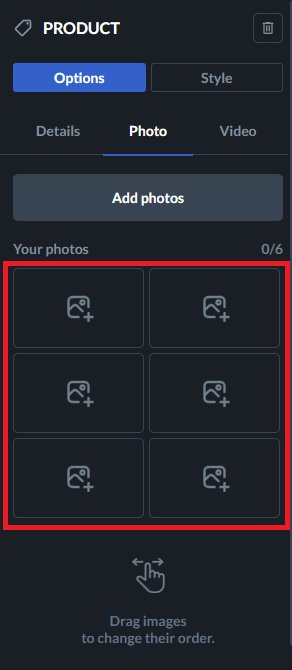
All the photos will immediately appear here:
❕NOTE ❕
Please remember that Publuu supports JPG or PNG images with the max. upload file size up to 5 MB.
ADD VIDEO
To add a video click on the VIDEO button.
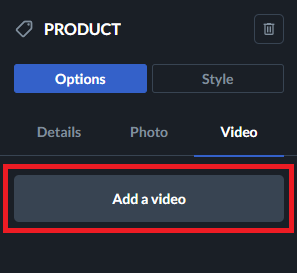
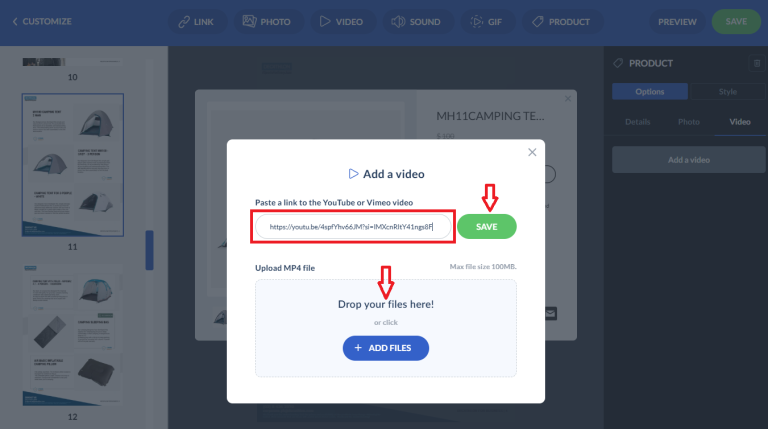
Once you do so, a pop‑up window will appear. You can paste your YouTube or Vimeo direct link into the field and press SAVE, or you can upload your own video for the product tag by dragging it into the upload area or clicking the blue ADD FILES button.
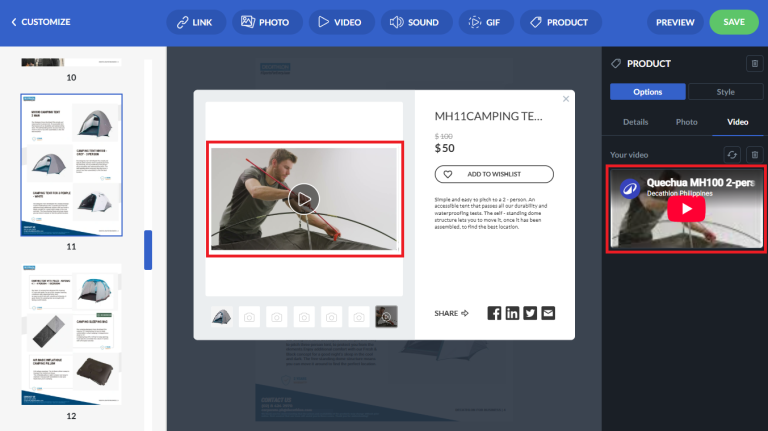
Afterward, you'll see it shows up here:
ADD TO WISHLIST
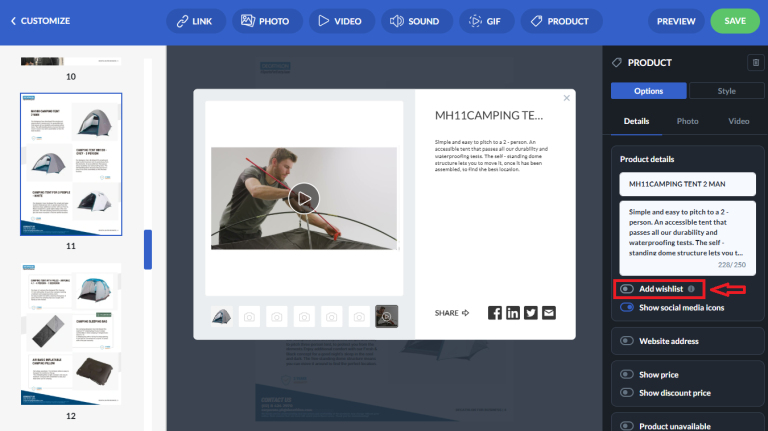
Next, once you’ve filled in your Product Tag with all the details and uploaded its photos and videos, the "Add to Wishlist" option will appear. This feature is enabled by default, and you can leave it active to allow your customers to add products to their wishlist,
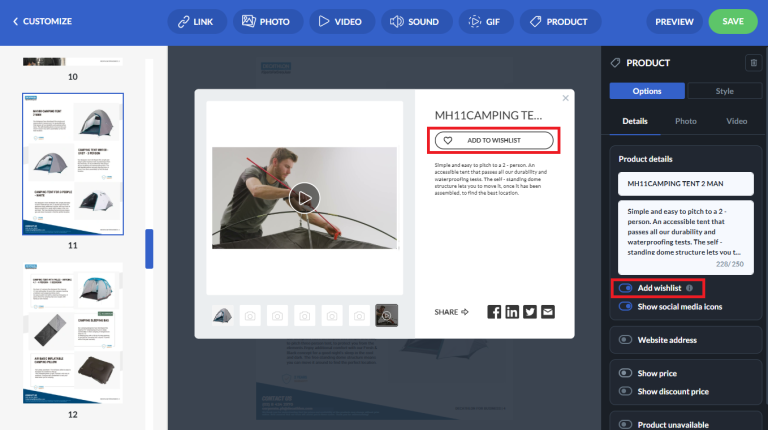
or disable it as you prefer by toggling the button to the left so that "Add to wishlist" will disappear from the pop-up.
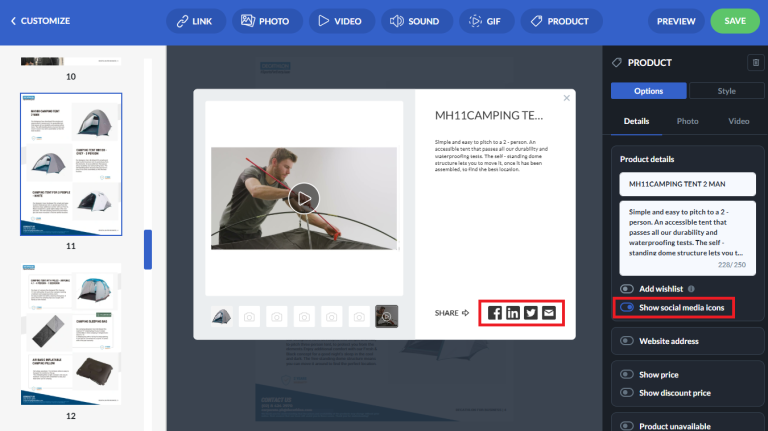
In addition, the social media icons feature is also enabled by default, so your product tag can be easily shared further — for example via Facebook or email.
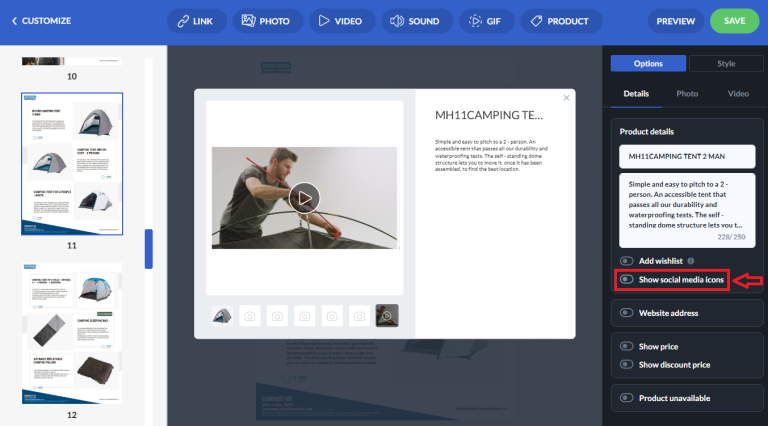
However, if you prefer not to have it enabled, you can turn it off by toggling the button to the left until it turns grey. Once disabled, all social media icons will be removed from the pop‑up.
ADD WEBSITE ADDRESS
In addition, if you wish you can also transfer your customers directly to your online store. To add a direct link, toggle on the website address button to the right so it's enabled and then paste the target website URL in the white input.
Once you add a website address it will be accessible through the VISIT WEBSITE button.
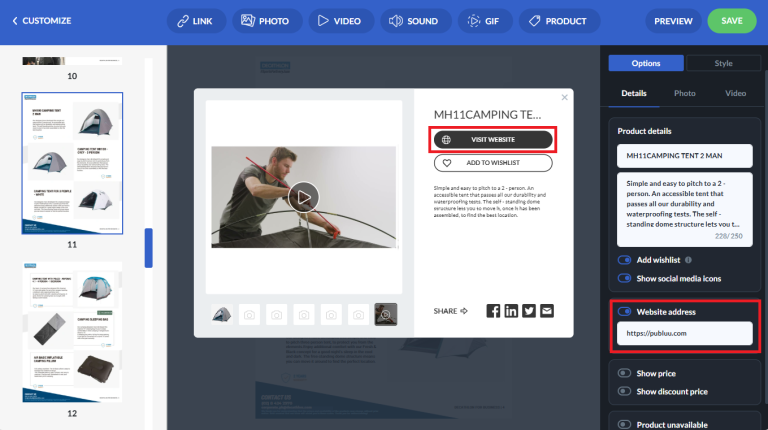
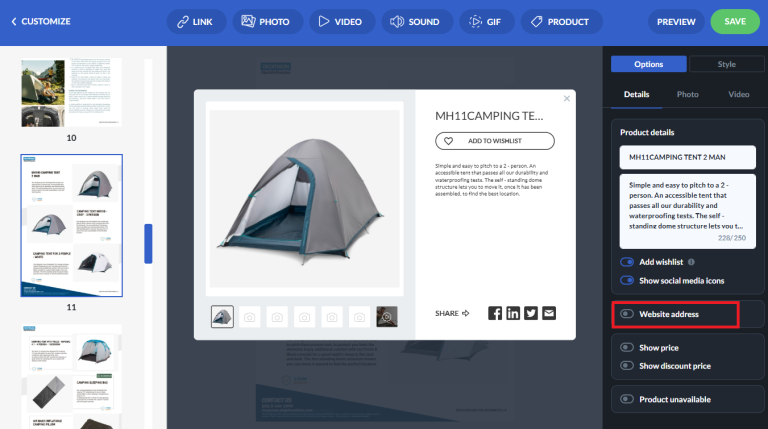
If you’d like to hide a website link, you’d need to shift the WEBSITE ADDRESS button to the left.
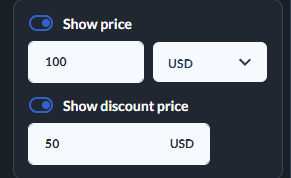
Next, you can decide whether you want to add a price and the discount price, or none here:
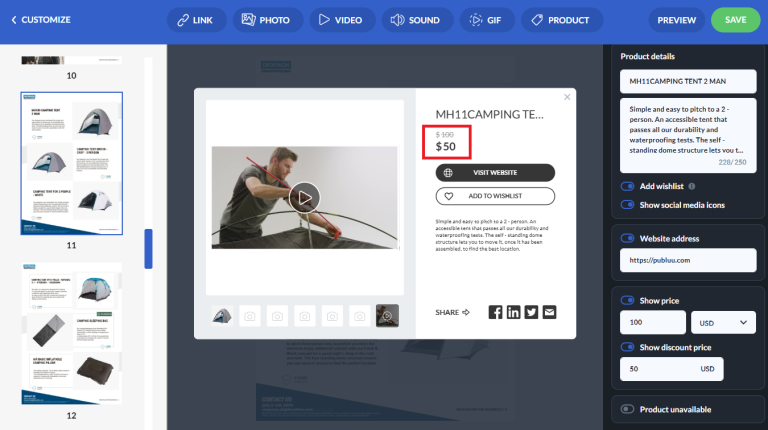
Once you set the prices up they're shown like this:
You can also choose whether you want to display the product availability or not. The option indicating that a product is unavailable is turned off by default :
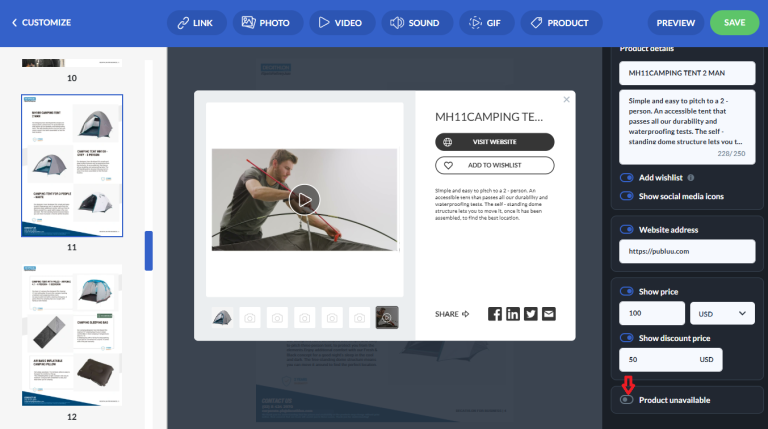
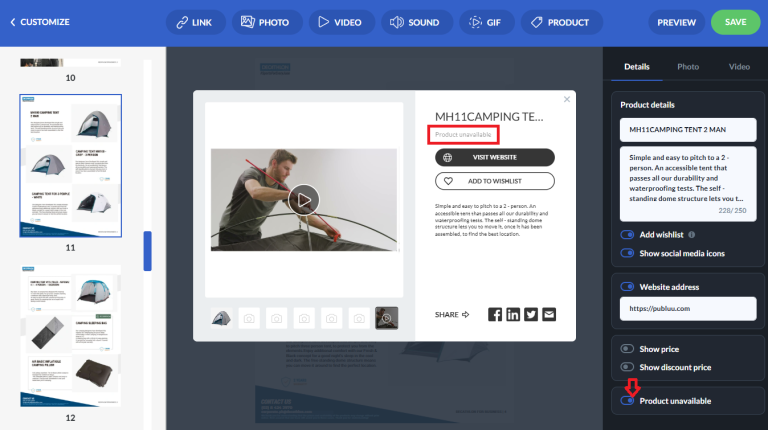
If you want the information to show that a specific product is not available at the moment, enable the option by toggling the button to the right so it becomes active.
CUSTOMIZE HOTSPOTS
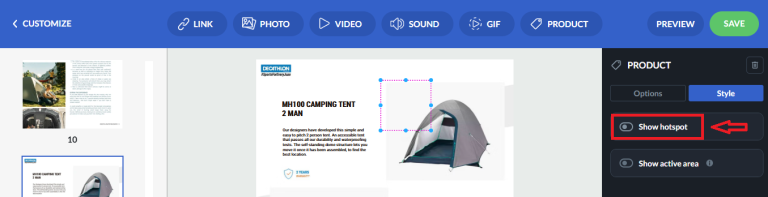
When you close the pop-up, click on the STYLE button and decide that you want for the hotspot to be shown, you'll see a Product Tag hotspot placed on the page, which appears like this:
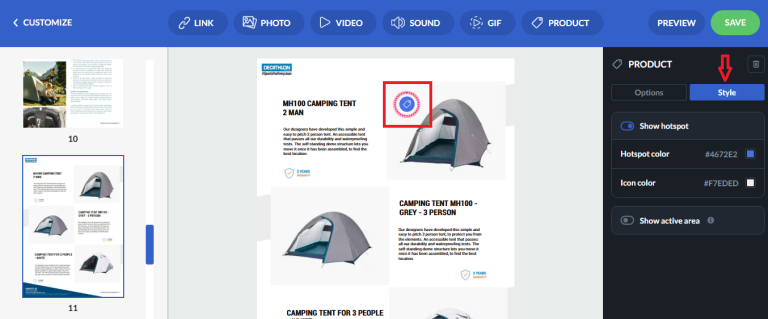
You can drag it with your mouse button and place it wherever you prefer.
At the bottom of the customization menu, you can change the hotspot or icon color. You can also apply the colors which were lastly used.
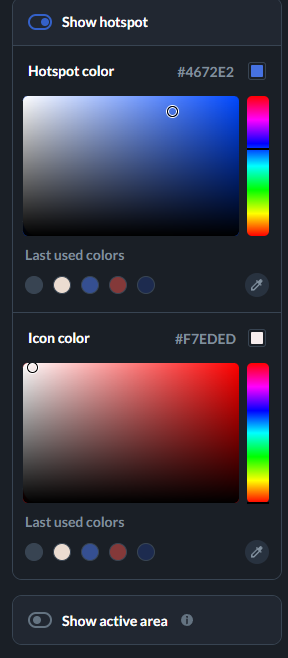
If you'd like to disable the hotspot button in your flipbook, you can easily do so by toggling the switch off. Once disabled, the hotspot button will no longer appear in your publication.
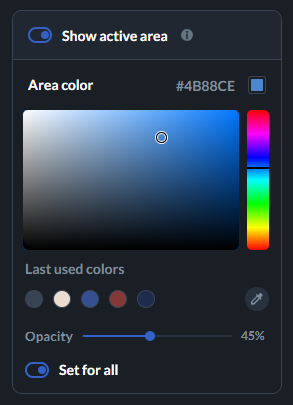
In addition, you can customize the color of the active area for your hotspot by turning it on. You can also use the SET FOR ALL option to apply the same color to all hotspots in your project.
What’s more, you can also control how strongly the hotspot appears on the screen by adjusting its opacity. Simply use the slider above the color area to set how transparent or solid you want your element to be.
To find out more about hotspot preferences and how to customize them read our article about how to customize hotspots.
Let's move to the last step!
STEP 5
Now it's time to ensure that the Product Tag works as expected. To do so, click the PREVIEW button in the upper right corner.

Once you test that everything works as should press the SAVE button.

Congratulations - you've just created your first Product Tag! Now it's ready to be browsed by your customers!
But that's not all the Product Tag has to offer. Take a look!
Once you open your flipbook viewer and click on the chosen Product Tag, it will display as a pop-up like in the screenshot below:
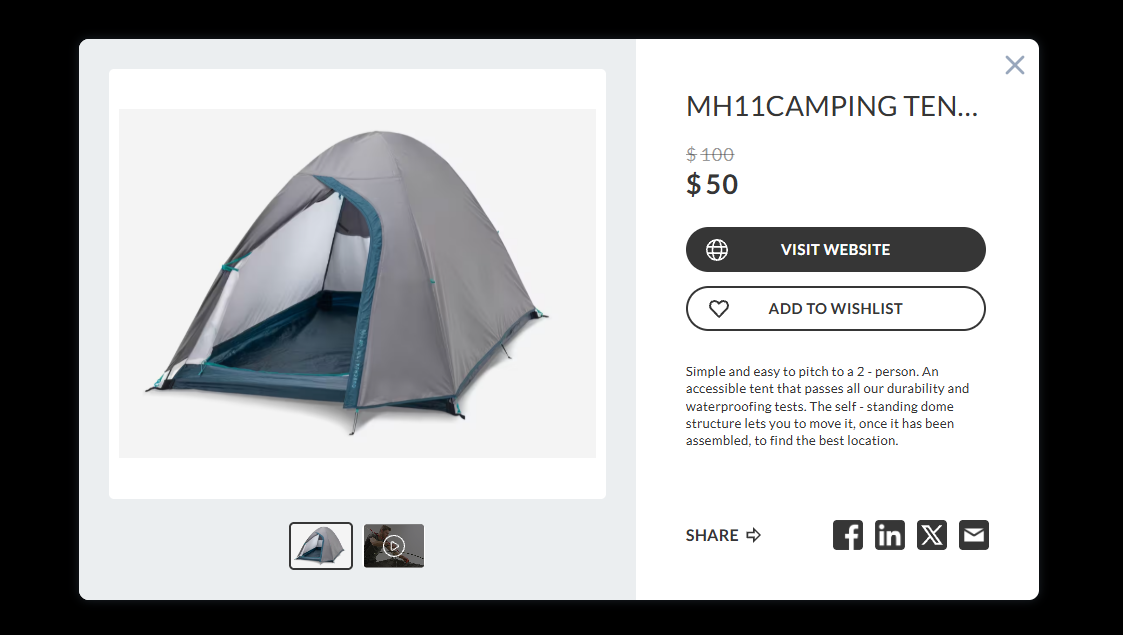
Now you can see all the product details you’ve provided and options such as VISIT WEBSITE and ADD TO WISHLIST buttons, and sharing options.
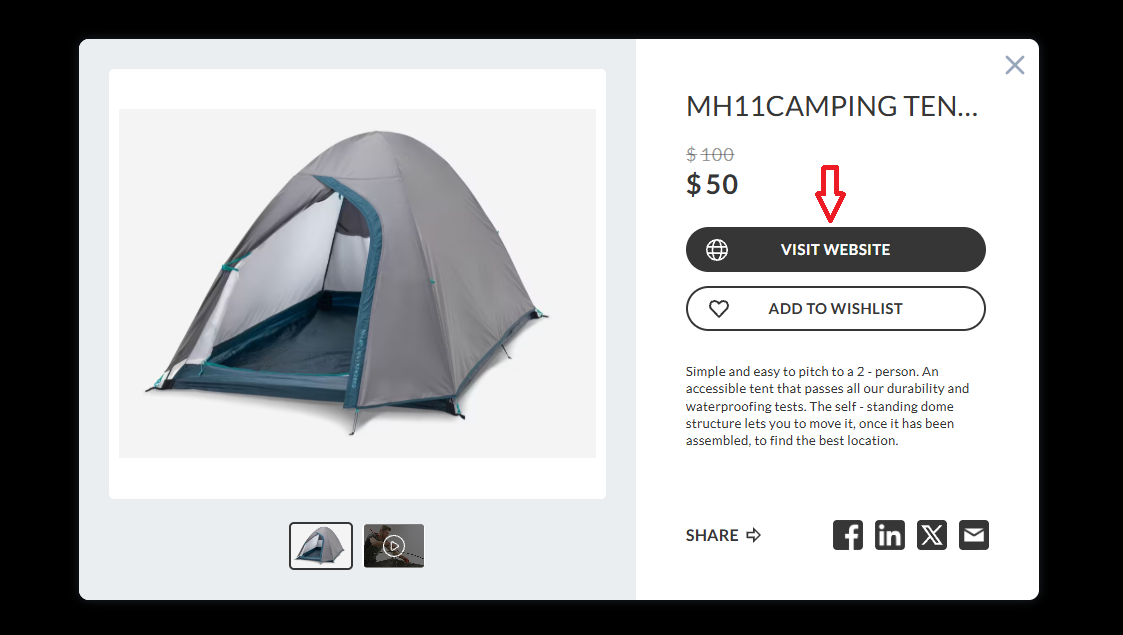
Once the customer clicks the VISIT WEBSITE button, will be directed to the product's website, where can learn more about the item and make a purchase if desired.
ADD TO WISHLIST
After clicking on the ADD TO WISHLIST button, the selected product will be added to a wishlist which appears right after in the top menu of your flipbook in the flipbook’s viewer:

Upon clicking the wishlist button the WISHLIST will pop up on the left side, with the added products.
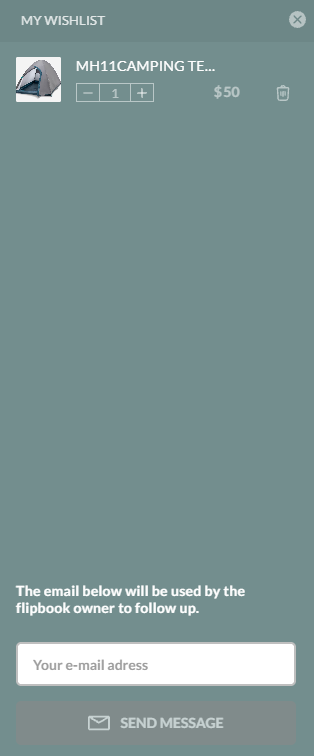
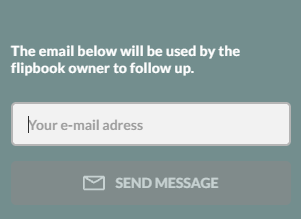
At the bottom, you’ll see the white input window for providing a customer’s email address if wishes to receive updates, notifications, or special offers related to the product.
Isn't it great? Start tagging your products today and take your management to the next level!
TIPS ON ADDING PRODUCT TAGS
💡Use graphics. Add eye-catching images or GIFs to mark the presence of product tags, making them more noticeable to readers.
💡Provide valuable information. Ensure that the product tags offer necessary information such as product name, description, and pricing.
💡Maintain consistency. Keep the design and placement of product tags consistent throughout your digital publication for a polished look.
You may be also interested in:
How to add links to your online flipbook?
How to create and add a custom form to my flipbook?
